.jpg)
Mornin' hens!
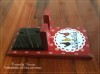
I thought I'd share my new agenda with you today. I received it from Lil' Chick for my half birthday! We both love agendas and I use mine everyday for my job. It helps me stay on track and organized more than you can imagine. Yes, I also have reminders on my iPhone but there's just something about an agenda I love. And now, decorating them is all the rage!! Well, we stampers are one step ahead of the game because we already have most of the supplies, right? LOL! Anyhoo, the Kate Spade agenda looked like this when Lil' Chick gave it to me.

Not bad, but I HAD to personalize it, right? Hey Silhouette!!!!

This is what she looks like now. AWESOME!! I cut the monogram from Gold and matte Black vinyl, using my Silhouette. Love it!! The little orange and black bow was made using pre-made bows from the Recollection line at Michaels. I bought packages of the Gold/Ivory and the Black/Ivory bows. For Halloween, I took one of the smaller Black/Ivory bows and colored the ivory stripes orange using my Copics. Then I hot glued all the small and medium bows to gold paper clips and covered the hot glue with a small piece of felt so the back looks nice too. I gave a set to Lil' Chick and made a set for myself too!

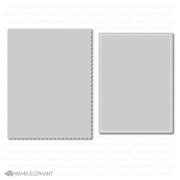
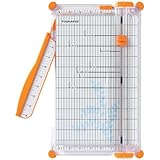
Next, I wanted a few dividers. I didn't need all that many as the months already have tabs, but to easily turn to the current month, or following month, I added dividers. I did this by laminating designer paper and then I die cut a tab edge on the right side. Using my label maker, I added the titles to each tab.

Of course I had to add a photo of Jaxon so I could see his cute face everyday!!
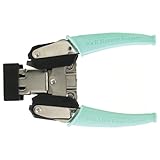
Oh, and you might notice that these rings do not open, so I made a template and marked where each ring was and using a heavy duty 1/4" hole punch, punched holes along the left edge. Then I took my scissors and snipped from the left edge into each hole. Now, you can take the divider out and move it as you like. The laminated sheet is very sturdy and it doesn't hurt it at all.

This is the back side of the divider with Jaxon's photo. Again, I used matte black vinyl cut with my Silhouette Cameo.

This is the last divider. I just love this photo of Lil' Chick's happy family. My cup runneth over...

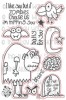
You can see the little tabs for each month here. This is the cover page for October. This set is from The AlleyWay Stamps. What a hoot!!

This is November's cover page. These are just stickers. I never thought I'd be using stickers again, but they're so much fun to use when decorating your agenda.

...and December's cover page. Again, these are stickers but I stamped the sentiment.
The white cardstock (i.e. snow) was cut to add a little background to the scene.

This was a set of flags I picked up from Target's dollar spot. It was about an inch longer but I cut off the bottom edge and removed the last two stacks of flags too. Then I added some washi tape to cover up the raw bottom edge and rounded the bottom right corner too. Oh, and I added the title to the top tab using my label maker. I punched the holes on the left side just as I did with the other dividers.

And last but not least, I thought I'd show you this daily divider I made. I saw this on YouTube HERE and wanted to try it out. Super easy to make. and it comes in really handy to flip to the current day. The turkey behind it is only a sticker and not actually on the divider. I've tried to list as many of the supplies I used below in case you're interested. Okee dokee, that's it for me today. I hope you hens have a MARVELOUS Monday!! {{{hen hugs}}}
Supplies:


WOW, that is not only handy and functional it is perfectly personalized. Love the photo of Lil' chicks Family. :)
ReplyDeletewow I love this and how you personalized it. What a fun journal / planner to see daily.
ReplyDelete